Getting into Gig-A takes about a minute. Your account is what lets you create gigs, upload datasets, and start asking real questions with verified answers. Follow the steps below to get set up.
Before You Start #
You’ll need:
- An email address you check regularly
- A password that isn’t “Password123”
- (Optional) A Google account for faster sign-up
Step 1: Sign Up #
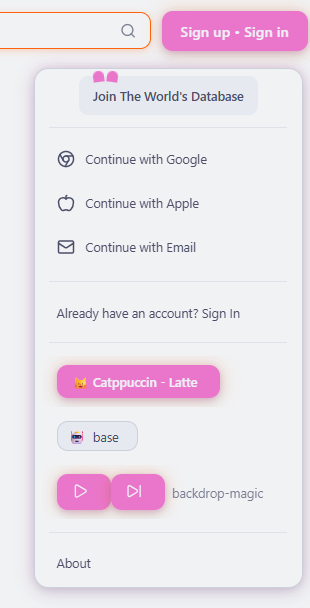
- Go to the Gig-A homepage.
- Click Sign Up.
- Choose Email or Continue with Google.
- Enter your details and click Create account.
Note: If you don’t see a confirmation email, check your spam folder or search for “Gig-A”. You can always restart the sign-up process if needed.
Step 2 – Confirm Your Email #
If you signed up with email:
- If you signed up with email:
- Open your inbox.
- Look for a message from Gig-A.
- Click the confirmation link in the email.
If you don’t see it:
- Check your Spam or Promotions folder.
- Search for “Gig-A” in your inbox.
- Wait a minute or two in case of delay, then try resending the confirmation.
Step 3 – Log In #
- Go to the Log In page on Gig-A.
- Enter your email and password, or choose Continue with Google if you used Google sign-in.
- Click Log In.
Once you’re logged in, you’ll land in the main Gig-A interface where you can create and manage your gigs.
If you forget your password, click Forgot Password and follow the instructions to reset it.
What You Can Do Next #
Now that you have a Gig-A account, you’re ready to start using the platform.
We recommend following these next steps:
- Upload Your Data & Configure Your Gig – Learn how to upload a spreadsheet, connect a database, or link an API, then set up fields and permissions.
- Ask Questions Using Chat & Voice – Use natural language or your voice to explore your data and get instant answers.
- See Verified Answers & Share Your Gig – View the SQL query and source data behind every answer, then embed or share your gig with others.
Welcome to Gig-A – your starting point for building “The World’s Database.”


